
Show Posts

This section allows you to view all posts made by this member. Note that you can only see posts made in areas you currently have access to.


Messages - w1ll337

Pages: [1] 2 3
1
No but found a good deal. Also I will be having TT clip-ons and it looks nice 8)

No recommendations unfortunately.
But if you had to guess, do you think 58t should easily fit without rubbing the chainstay?
Did you buy the wheels?

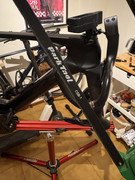
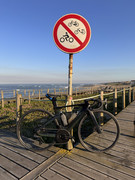
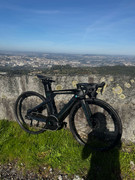
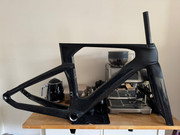
I cut the fork a little more to reduce the slack, and I’m going to cut it a bit further to have it SLAMMED. I hope to have the XMCS 65/78 wheels by the summer.


3
No!
Should I have? Upon Peter’s recommendation I chose the following setup:
D78CU-33/D65CU-33 T800 rims 24/24H
R280 hubs 24/24H 36T rachets TPI steel bearings center lock straight pull for 100*12/142*12 with Shimano HG driver
Sapim CX-Ray spokes
Sapim self-securing aluminum nipples

I don’t know a thing about wheels. Extra spokes mostly unnecessary? My weight is 85+ kg.
I haven’t paid yet so I could check if it’s still possible to change.

So if you want to reduce a bit of weight, I’m thinking of ordering the T1100 65/78 with 16/18H hubs. But I know there are also the lightweight hubs for 20/20H, so that could be another option.

I'm looking to get 58/44 chainrings for the bike.
I might possibly need a wedge adapter for the front derailleur.

But does anyone know if they should fit the frame without touching the chainstay?
Are you Pogačar or what?  :D
I’m currently running 54/40 and so far it’s working well. But I’m thinking about installing a chain guide to avoid chain drops.

Have any recommendations?

4
Had decided for the Mondince FM126 earlier but the ability to ride a more forward position on this bike made me change my mind.

Happy to have found a bargain used full groupset too: Dura Ace Di2 11sp for 400 EUR.
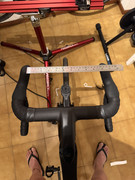
And aero drop bars with attachable TT clip-ons from a Lapierre Aircode DRS for 200 EUR.
78/65mm wheel combo from XMCS coming up :D

Will update with photos once I've put it together. Thanks for the help deciding!
Did you order the wheels with the 16/18H or the 20/20H lightweight option?

I’m really curious to see this combination on this frame, because it’s the same setup I’m planning to install, also with 5 mm spokes.

5
Road Bike Frames, Wheels & Components / Re: Velobuild VB-R-368 Aeroframe
« on: February 24, 2026, 09:41:20 AM »
Yes. It's gotta have a few mm between top cap and fork compression doohickey to tighten things down.

I know there are varying degrees of QC on these (and many other Chinertown) frames, but am I alone in thinking that's the reason we're able to buy them for a fraction of the cost of the big brands  :-X

I installed an additional 7.5 mm spacer below (I had to cut it slightly to allow the hoses to pass), and now it feels better, with minimal slack (video attached).

Next, I will cut the fork, but to do that it will be necessary to disconnect the hose and bleed the system again.

At the moment, I feel the handlebar slightly pulling to the right side. It may be because there is a bit more hose length on that side, which could be creating some tension and influencing the steering.


6
Road Bike Frames, Wheels & Components / Re: Velobuild VB-R-368 Aeroframe
« on: February 22, 2026, 12:25:39 PM »
Assembly is correct yes. Have you tightened the top cap enough to elaminate the play? Or is the fork still too long and you don’t get bearing compression at all? Or you tightened the stem onto the fork before you tightened down the top cap?

Order: assembly everything, every bolt is loose
Tighten Compression plug, then tighten the top cap. Only then the stem or handlebar.

I had a similar problem when building the bike. Check the distance between your expander plug and the top cap. The top cap is very thick and easily collides with the expander preventing you from tightening the headset.

Thanks, everyone. I reassembled it and kept the clearance, based on the images below. Do you think I need to cut a little more so that the expander fits further into the fork?

7
Road Bike Frames, Wheels & Components / Re: Velobuild VB-R-368 Aeroframe
« on: February 22, 2026, 09:48:44 AM »
Hi all,
after following this thread since a few months, I guess it's time for my first post:
Having owned a Workswell WCB-062 MTB for 10 years now, and building a LC LCR-017D last year, I decided now's time for a chinese aero bike. Shopping around a bit there doesn't seem to be a lot of choice in the budget category (<700€), except for the VBR-368, or some TanTan models.
As the TanTan quality is known to be a bit hit-and-miss, I decided to go for the 368, mostly based on looks, as there really is no rational reason to buy this bike because it is just so damn heavy and not aero tested. But I want a bike I take a look at and think it's sick over the fastest possible bike that looks like any other, so I still went ahead.
Below are a few of the experiences and problems I hade while ordering and building the bike:

Order and Delivery
I Ordered the frame on 23.01.2026, with some Serenade 60mm deep wheels to go along. Communication before the order was good, although it was not as perfect as with LightCarbon last year. Ordering a custom design was no problem at all, with just two questions back about specifics and a confirmation that they can do it.
After ordering, the painting process took 14 days before shipping (with the frame currently being in stock).
The carrier they used for shipping was quick, but had some weird tracking that didn't update for some time. On 20.2.2026 (28 days later), the frame arrived in a big cardboard box with a large tear on the side [box_tear.jpg]. Luckily everything inside was very well packaged and completely fine.

Building experience
Building this bike was not an easy task, as there is definitely a lot to go/do wrong for less experienced mechanics or people with a limited toolset. Heres a list of things you have to watch out for when building up this frame (or at least my sample):

Paint quality
The paintjob on this frame only costs 70$ for 4 different colors, which is reflected in the quality: There's paint overspray on basically any surface that shouldn't have paint on it.
- The headset area on the top and bottom had some paint on it, but nothing that couldn't be fixed by careful swinging of a sharp blade [headset_overspray.jpg].
- The rim of the T47 bottom bracket has a noticable paint lip around it. This doesn't interfere with the installed BB, but if not removed you may chip your paint with the installation tool [bb_overspray.jpg].
- The rear brake mounts had extreme amounts of overspray on them and need to be faced before mounting anything to them [rear_brake_overspray.jpg]. The paint on the top also just chips off when you touch it on an edge.
- The rear dropouts are also extremely bad, most of the paint in there has already flaked off, even though I had freshly unwrapped the frame at the time of taking the image [dropout_paint.jpg].
- The paint overall seems to be extremely soft, as it already contains a lot of small scratches and swirls, even directly after unpacking the frame.
- The paint is visibly scratched next to some holes in the frame and handlebar that have been opened up by some rotary tool.
- Worst of all: My design included a little german flag, but they messed up the order of the colors and I now have a Belgian bike  :'(


Small parts
The quality of accessories to the frame seems to be much worse than that of my LightCarbon, or even my old Workswell frame. With those, all the cable guides (outlets(?)) were fitting securely in the frame and didn't rattle. Unfortunately with this frame the DI2 outlet below the front detailleur mount was very loose and couldn't be tightened enough to stop rattling, as the frame just wasn't thick enought at that point to be clamped by the mechanism. I had to fix this problem by putting a few layers of ducttape on the inside part of the clamp, to slightly shim the two halves apart [cable_outlet.jpg].

The supplied spacers and headset cover are also a bit disappointing. The headset cover is not injection moulded like the rest of the parts, but 3D printed. On it's own this isn't too bad, but then having it sanded slightly gives it some grey color that doesn't fit the spacers. I will 3D print my own cover and spacers here to match their colors.

The spacers are also the most annoying ones I have ever installed, as they fall apart from what seems like air movement as long as they are not squeezed yet.
The hole in the bottom of the handlebars to register their angle to the spacers was also much too small on one side of my pair, and had to be opened up with a little knife to be able to fit the spacer in there. Unfortunately it's very hard to see this on camera [handlebar_hole.jpg].
Also definitely ask for some extra spacers with your order, as mine came with 2.5cm of spacers, which should barely be enough for many riders on such a relatively aggressive frame (1cm is the minimum you need use with the default headset cover).

Threaded stuff
BB
Overall, it seems Velobuild doesn't really know what they're doing with regards to anything threaded. The T47 BB threads are extremely rough, to the point it easily shows up on my phone camera [bb_threads.jpg], and also seem to be super dirty for some reason. Unfortunately I don't have a 47mm big thread cutter, so it will have to stay that way. Even if I had one it wouldn't be of much use, as the threads are so exceptionally loose, the BB has a lot of wiggle even when screwed all the way in, but not yet touching the shell's outer surface.
I'm also certain that either the threads on both sides are angularly misaligned, or the flanges of the shell are misaligned, as the side of the thread insert peeks out of the carbon shell at the back of one side, but not on the front [bb_threads.jpg]. On the other side, the insert doesn't show at all.

Overall the bottom bracket shell quality of the frame seems to be super bad, the worst of any chinese frame I own. The threads on the left side were so bad, I tried to find the start of the threads for 2 minutes before finally being able to thread the BB in.

Fork
Another important threaded part of the frame, and equally bad to the BB were the front brake mounts. For some reason those were so full of stuff (paint overspray? carbon dust from manufacturing? idk) I couldn't thread the screws in more that 2 or 3 mm on both mounts. Sure, recutting those M5 threads is a relatively easy task, but not something I expect to have to do to build my bike... [fork_threads.jpg] (Pictures from here in second post)


General confusion
Maybe I havent built enough modern bikes yet to know if some of those are some agreed to standards, but I was also very confused by the lack of any hints on how things go together. The frame includes two different headset bearings, one 7mm and one 8mm tall, but makes no mention which goes where [headset_bearings.jpg]. For future reference: The thicker headset bearing goes on top. Mine had a red seal Not a huge problem to have, but as it would be so easy to mitigate by including a single sheet of paper with the frame, I'm still marking it up.

There also is some small aluminium part included, the purpose of which seems unclear to me [weird_pard.jpg]. Going by the hole spacing it fits on the bottom of the downtube right before the BB area, but why should one put it there and what does it do? Pls help

Somehow, not only me but also VeloBuild themselves seem to be a bit confused on which parts are needed to build up the frame, as my fork already had the camfer to fit the bottom headset bearing molded in, but the accessories bag still included the little ring to put on the fork [fork_ring.jpg]. I'm not sure why that is included if it isn't needed, as it lead to a bit of confusion on my side when building the bike.

Seatpost
Having read the troubles on the earlier pages of getting the seatpost not to slip, I preemptively greased the bolt and sliding surfaces of the clamping mechanism, and put carbon paste on the seatpost. This seems to work very nicely, as I haven't noticed any slipping yet (although I only tried to get it to slip indoors, as I'm waiting for the nice weather next week before taking it outside). My seatpost also fits pretty snugly in the frame, without any of the problems previous posters had. The inside of the frame looks a bit rough/unfinished where the clamp goes in, but it didn't hinder anything from going together.

When cutting the seatpost to length however I had a pretty alarming issue. Finishing the bottom of the  cut, a 5mm wide section of fibers just delaminated from the seatpost, and started pulling away from the rest [seatpost_delamination.jpg]. Pulling it away further was also very easy. It felt like I could unwrap the whole seatpost if I kept going, so I broke the fibers by kinking them the other way.
Having worked with carbon a for a while, this is not anything I expect from anything well adhered. Normally you should pull your muscles trying to get a millimeter of that stuff to come from the rest, so It seems to me that my post is somehow faulty. Looking at it from the bottom, I couldn't see any signs of weak compression or voids so I'm not sure what happened there.

Overall this doesn't really inspire confidence in the rest of the frame, but as I seem to be an idiot I'll still go ahead and ride it to find out.

Weights
Frame (Size 49): 1464g
Fork (uncut): 526g
Handlebars (38x100): 375g
Seatpost (uncut): 342g

Conclusion
Overall I am disappointed with the quality of this frame, especially compared to my LCR-017D which was the same price (admittedly without a complex paintjob). The strucutural quality of the frame seems fine to me for now, but there's just a hoarde of little things wrong with the frame that need to be fixed before building it.
Had I known all of these things before I maybe would not have bought the frame, although I'm still a sucker for the looks of it, so who knows.
I still built the bike up after fixing all the problems, and can confirm the new SRAM Force E1 rear derailleur does not hit the inside of the frame anymore.

I also finished assembling mine this week, and it wasn't an easy task, mainly because there are no instructions on where the parts go. I'm still not sure if the head tube is assembled correctly, because there is backlash, as shown in the attached video, and I don't think that's normal. Has anyone else had this problem
?

So far, what I understand about assembling the headset is that only the black bearing goes in the bottom part, without the fork ring, and the red bearing and C ring go on top, followed by the spacers. Is this really correct, guys?


8
Road Bike Frames, Wheels & Components / Re: Velobuild VB-R-368 Aeroframe
« on: February 17, 2026, 09:24:10 AM »
Hi guys, I’m assembling the bike today and have a few questions.

What’s the correct way to do this? There isn't a C-ring at the bottom, right? And for the top, is it just the one large C-ring, or are there two?

Also, does the front caliper use M4 or M5 bolts? I have M5s, but I’m having trouble installing them. There might be some paint in the threads, has anyone else dealt with this?

9
Road Bike Frames, Wheels & Components / Re: Velobuild VB-R-368 Aeroframe
« on: February 12, 2026, 08:47:10 AM »
BB T47 internal like attached

Thanks, but the bearing that I want to know is for the headset.

10
Road Bike Frames, Wheels & Components / Re: Velobuild VB-R-368 Aeroframe
« on: February 12, 2026, 03:50:15 AM »


Does anyone know exactly which bearings are needed for the headset?

I was checking the measurements to cut the fork and installed the red bearing on the bottom, but Chris from Velobuild said this one goes on the top... however, when trying to remove it I had difficulty and even opened the sealed part of the bearing, and when reassembling it, I noticed what seems to be a small amount of slack, which has me a little worried.

Therefore, I would like to buy a new set of bearings as a spare, in case any problems arise during the final assembly next week. I have already requested the part from Chris, but I haven't received a response yet... and now, with the Chinese New Year holiday, I don't expect to receive a response anytime soon.

Could someone please share the exact specifications of the bearings so I can order the correct set?

11
Road Bike Frames, Wheels & Components / Re: Velobuild VB-R-368 Aeroframe
« on: December 30, 2025, 07:07:23 PM »
Hello I've built up my bike! I'm running SRAM Rival AXS with a 52/39 and 10-36t combo. 60mm wheels from Serenade with Pillar 1420 steel spokes (1365g). For cockpit I went with 28cm Bikedoc bars and a Kalloy Uno stem for ez adjustability in the future. My frame has the chainstay clearance issue which is super annoying... The shifting is really quite bad in the higher gears since I can't adjust the B-gap close enough. The hanger also seems to be a little bent, so i will provide an update once I get the hanger aligned.

First impressions are pretty good! This is my first carbon frame coming from a round-tube Ti bike. I actually noticed that it was more comfortable over rail road tracks and potholes even though I am using narrower 29/30mm tires than the 32mm on my Ti bike. Stiffness -- I can't really judge, I am 58kg and my sprint is shite so it's definitely stiff enough for me. The front-end handles quite nicely on my 49cm size.
Aero wise, it's a bit too cold and windy currently to test it, but it's not dramatically faster than my Ti bike which is similar in position. I'll see how it feels when I race it during the season.

Building it up was not super easy. The rear caliper mount had paint sprayed over it, so I had to file it down a bit; the caliper is still visibly crooked but not rubbing -- I need to face it down in the shop. Front brake mount was fine. Upper headset cup was a bit tight for the bearing but it went in fine. There's quite a lot of plastic in my headset stack so I've had to adjust the preload a bit so far due to the parts creeping. Also, the bottle cage mounts are too close together. The bottles interfere! I need to move the downcage up a little bit. All fixable things except the DAMN CHAINSTAYS! Going to reach out to VeloBuild and see what they say about it.

Tl;dr: sexy bike, but beware if you're running SRAM...
Did you buy it after they made the adjustment to the chainstay? It’s the same problem that Patrick Lino had, right?

12
Road Bike Frames, Wheels & Components / Re: Velobuild VB-R-368 Aeroframe
« on: December 15, 2025, 09:27:23 AM »
Has anyone ordered in the last month? I paid on 12/11, but I still haven’t had any news. I checked in on 02/12 and Chris said the painting would be done the following weekend. Then I followed up again on 10/12 and was told they were hoping to finish it the next weekend as well.

Just wanted to see if this delay is only with my frame or if anyone else is in the same situation.

13
Road Bike Frames, Wheels & Components / Re: Velobuild VB-R-368 Aeroframe
« on: December 02, 2025, 04:06:29 PM »
Got the bike more or less completely assembled, just missing a few non-vital parts like bar tape and proper bottle Cages. Here's some findings.

- The headset dust cover/top cap is hitting the frame (even with the C clip included). I made a small plastic C-shaped 0.5mm thick spacer and that seems to do the trick so it clears the frame (at least so far).

- The fork just slightly scrapes the bottom of the head tube (see attached picture). I'm guessing it might be hard to space this out, so probably going to sand the bottom of the head tube a bit so it goes more clear of the fork.

- The chain stay issue that Patrick also showed seems to be also present with Ultegra R8150 rear derailleur - I have not played around with chain length yet to see if that might change things (if someone is more experienced than me with B-screw vs. pulley wheel to cog clearance vs. B-screw I'm open for input). Basically you seem forced to have the B-screw tightened more than needed for the RD cage not to hit the chain stay. I couldn't get the ZTTO SLR Gen 3 11-32 cassette to shift well (it shifts OK on two other bikes here) as the cage cannot be moved close to the cassette, which seems pretty important for that cassette to work. I've put on an Ultegra 11-30 now and that seems to be better in the stand at least. You can see on the attached pictures how close the RD cage is to the chain stay currently, yet it's still quite far from the biggest (30T) cog on the cassette. If I loosen the B-screw to bring it closer to the biggest cog it will hit the chain stay in the smallest (11T) cog.

Unless I find a good fix for that last issue it is a bit annoying as I think it's quite the oversight in the frame design - and a bit surprising considering this is not their first frame. I know they've fixed it already in at least some of the sizes, but it seems they've also shipped some frames out with this issue after they became aware of it.

Can you share a photo of the complete bike? I'm curious to see the XS frame with the wheels. I also ordered an XS, and Chris informed me that this issue with the stay has been fixed, so I hope I won't have that problem.

I didn't quite understand your issue with the headset dust cover. Are you using their handlebars?

14
Road Bike Frames, Wheels & Components / Re: Velobuild VB-R-368 Aeroframe
« on: November 27, 2025, 12:57:32 PM »
Update about my issues. Velobuild and Chris have been amazing about my seatpost struggles and are sending me a new seatpost and seatpost clamp. They have been helpful with all possible problems and in understanding them.

Some photos of the complete build  ;D

Wow I live in Porto too, the second VB-R-386 will arrive in Porto soon!

15
Road Bike Frames, Wheels & Components / Re: Velobuild VB-R-368 Aeroframe
« on: November 26, 2025, 04:07:11 PM »
Got it a bit more assambled as I wait for the last parts to arrive in the next few days. BB threaded in easily by hand. Lower headset bearing snug but easy to fit by hand, while top bearing required a bit more force, but still possible by hand.

The custom top cover I got VB to print fits nicely with the spacers for the LC HBR17 handlebar except it didn't have the two small holes that each spacer has. Now I checked I see that the CAD I got from LC and sent to VB doesn't include those (as they didn't send CAD for spacer but rather just the headset top cap), so not any fault of VB. I filed off the two small tabs on the lowest spacer and then all should be good (as it still locks to the top cap by being sunk into it).

Next up is needing to cut the seat post and install the saddle, then put on shifters when those arrive and check the position before cutting the fork steerer.
Could you share this 3D spacer? I asked Lexon, but they haven't responded. I can compare and send it to Chris to see if it's the same.

Pages: [1] 2 3