Author Topic: IP-256SL build [finished - photos]  (Read 21023 times)

Cnasta

IP-256SL build [finished - photos]
« on: February 20, 2015, 02:45:03 AM »
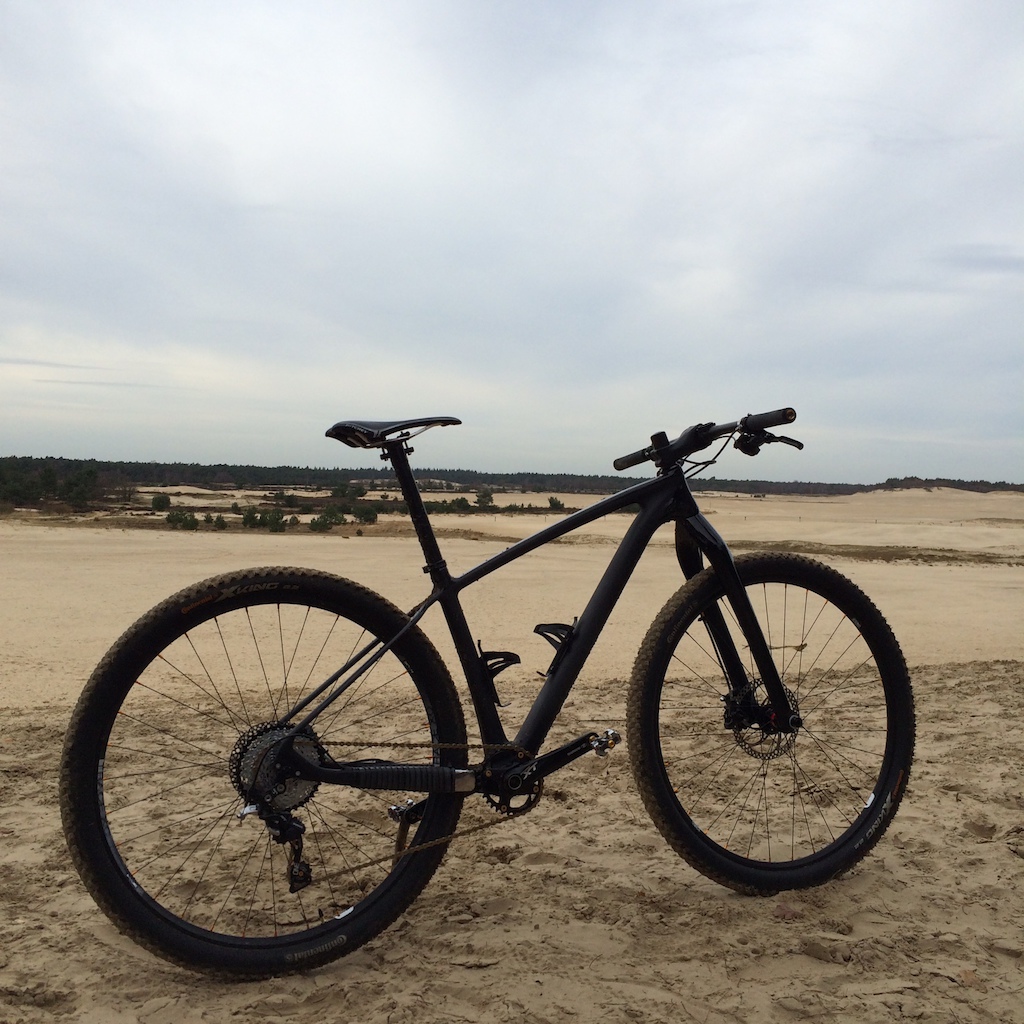
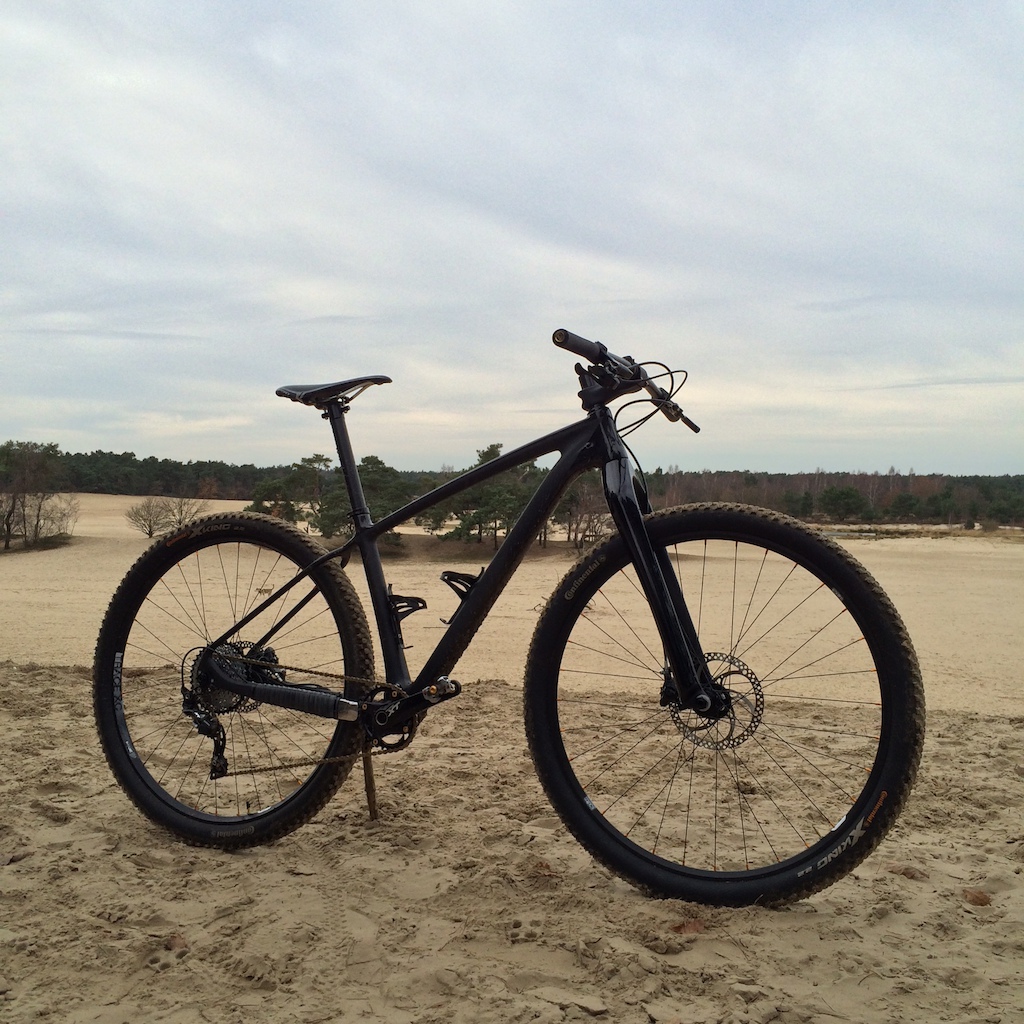
    Finished the Bike, editted my opening, edits in bold :)

    Ordered a
IP-256SL frame last week of december 2014. I knew it would take around 30 days to ship. After I received the trace-code of Peter, it only took 7 days until delivery! My total order was around 1090 dollar (all parts, paintjob, shipping, paypal). Customs set me back another € 111,00.

In this thread I'll post some pictures and will ask questions about my building problems (will be my very first complete build, until now I only did some minor chain/fork/crank-work).

If anybody has any questions regarding my build, ask and I'll try to answer (I have no digital scale, so weight-questions are hard to answer) :)

I got a lot of inspiration for my build from MTBr and Chinertown. Thanks for all the help until now! Especially: Carbon_Dude, MTB2223 and Vipassana.

First questions: Updates in bold
  • Since I don't have a scale, how much will be the weight of the complete bike (in Kilogram) :) I recon about 9kg with 1550gr wheels and single-ring setup. Might even be a bit less?
Still need to weigh, guess about 8.5kg
  • I don't have any liners in the frame for my cables. Just keep on pushing/trying until I hit the exit?
Yes, was easy
  • Carbonpaste on seapost, steerertube/forktube and no paste on handlebar?
Only used it at seatpost (to be sure, had no problems)
  • Grease: white, normal, on all screws and bearing grease on headset.
Used normal "white" grease. The stuff you use for all bike-stuff
[/list]

The parts I ordered from XMIplay (Peter, thanks for the speedy replies):
IP-256SL frame, 17,5",  thru axle, BSA, UD matte/glossy paintjob
FK-052 Fork 29'er 15mm, UD matte/glossy paintjob
Front and Rear thru axle
MTB handlebar IP-B04, 700mm, UD matte
Seatpost IP-SP7, 400mm, 31,6, UD matte
2x Bottle Cage IP-BC2, UD matte --> They don't hold my botles, will change them with the Tacx cages of my roadbike
IP-ST1 stem, 90mm, UD matte
Headset NECO
Extra dropout
Seatpostclamp
Chainstayprotector --> which sucks, no use at all

The parts I got in the Netherlands (partly 2nd hand, but new. Partly discounted goods from (dutch) webshops):
Shimano XT, FC-M785, crankset
Shimano XT, BB
Shimano XT, RD-M786 achter derailler, 10 speed, gs --> used a OneUp Components Rad Cage and a Goat Link
Formula C1 breakeset, black/silver, incl. 160/180 discs --> love the simple clean look, brakes quite good. Might change to XT when I have problems in the future. More budget now than a year ago. The Formula's set me back only 125 Euro (incl. discs), new.
Pedal: Xpedo M-Force 4ti (230gr, nice!)
Shifter: XTR SL-M980, 10sp --> best ever
Absolute Black Oval 32t Chainring --> love it, just not for tarmac trail-connecting roads. But MTB is hardly ever used on tarmac, so no problem. Perfect for Dutch Trails
Absolute Black 40t rear-cog range extender --> needed for the hilly courses
ESI Racers Edge grips --> the skinny ones, chunky to big for me
Continental Xking tires, 29x2.2, tubeless setup --> only need a floorpump, easy setup!

Still to buy: all bought
Sadle, will use old one --> still using it, won't change. A Ritchey WC thing I think
Wheels: will be a handmade wheelset with Ryde Trace rims, Novoctec hubs, weigth will be around 1550gr. All black with gold spoke nipples --> Hand build by Eleven Wheelwork (Nijmegen, ask for details). Perfect build, quite affordable, better than any I ever tried.

Pictures (crappy phonepictures, more will follow):


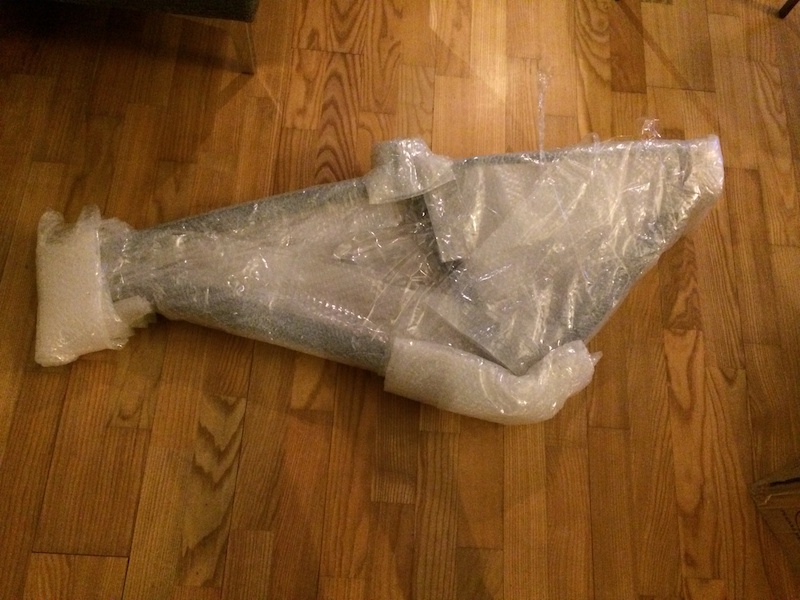
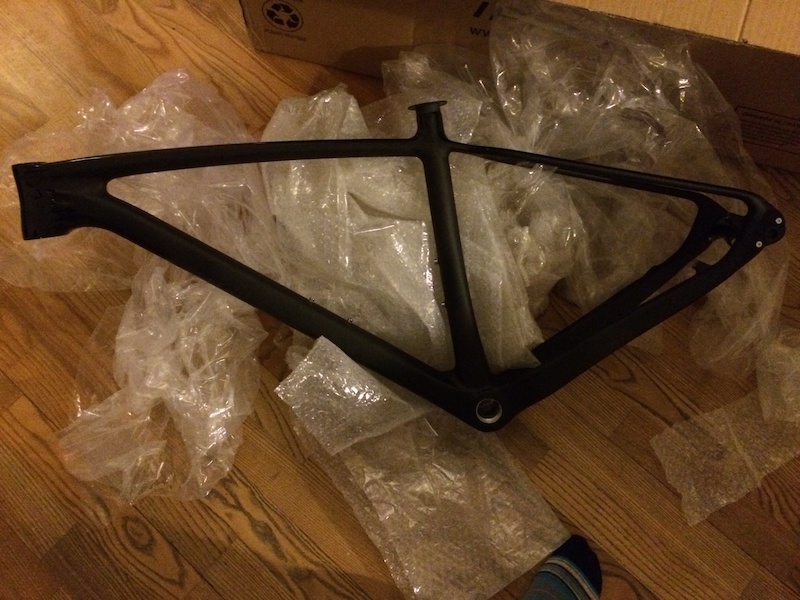
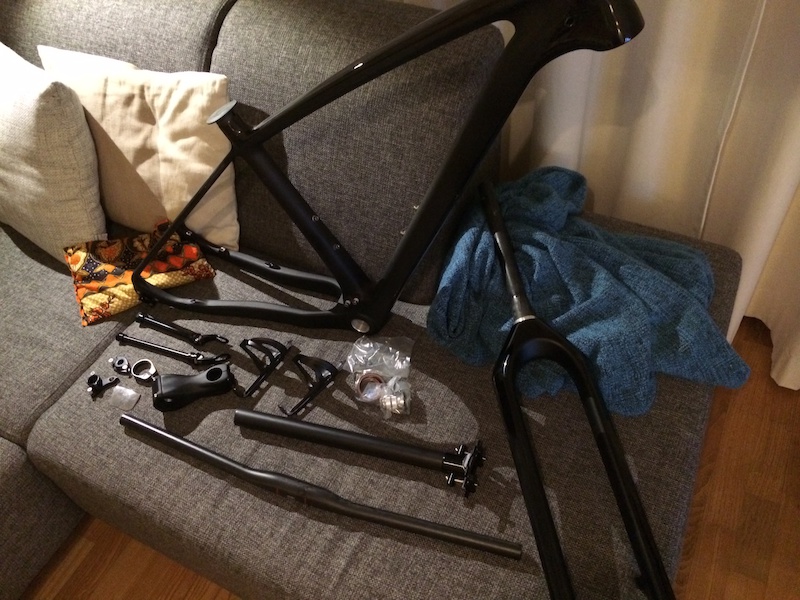
The bike will be black matte, with partly glossy black paint. The build will have some minor golden details (pedal, spoke nipples, chainring-screws, derailler screws and maybe the seatpostclamp --> still in doubt about the Clamp, think I keep it black).

New photo's

« Last Edit: October 29, 2018, 09:10:26 AM by Cnasta »


MTB2223

Re: IP-256SL build [disclaimer: questions inside]
« Reply #1 on: February 20, 2015, 03:12:00 AM »
First questions:
  • Since I don't have a scale, how much will be the weight of the complete bike (in Kilogram) :) I recon abount 9kg with 1550gr wheels and single-ring setup. Might even be a bit less?
  • I don't have any liners in the frame for my cables. Just keep on pushing/trying until I hit the exit?
  • Carbonpaste on seapost, steerertube/forktube and no paste on handlebar?
  • Grease: white, normal, on all screws and bearing grease on headset.
Hi Youri,

1]
I've got almost the same setup as you. I've got a 680mm handlebar, RockShox Reba RL fork and standard SPD (m520) pedals.
I started my setup with a 2x10 drivetrain (XT) and the weight was about 9,5 kg.
Now I'm riding the bike with 1x10 (as we discussed in our PM's) with a Absolute Black 34t chainring (I wanted the oval one, but it wasn't on stock by the LBS Mantel). And still using the standard 11-36 XT cassette. The weight now will probably around the 9,2 kg.
To be honest, the weights are WITHOUT pedals and other accessories (like my Garmin).
I think you setup will be 1 kg lighter, about 8,2 kg ?
2]
I had liners in my frame. It makes it a lot easier.
I running my RD cable full hoses. I had to drill the cable holes at the front and back. At that point, I hadn't a liner for this cable anymore. I used some iron wire (the iron wire (with some thin plastic on it) you're using in the garden to fasten plants to the fence or whatever). I put in the iron wire, which was my liner from that point. And then it's easy again.
The only tricky part is the rear brake cable if you don't have a liner. Try and be patient :) Start at the back and pull it forwards.Don't install your fork yet.
3]
Carbonpaste every where two elements are connected to each other and carbon is involved. So, carbonpaste at your seatpost and handlebar. Connection between stem and fork is aluminium on aluminium. No use of carbon paste needed.
4]
White grease (montagepasta) on all your screws. For some screws it's better to use locktide.
Bearinggrease on your headset and BB.

I've got the same bottle cages as you and these two sucks! When going down on a bumpy trail, I always lost my water bottles. Most of the time I'm riding with a camelback, so it's not a big issue for me.
« Last Edit: February 20, 2015, 03:14:39 AM by MTB2223 »

MTB2223

Re: IP-256SL build [disclaimer: questions inside]
« Reply #2 on: February 20, 2015, 03:20:57 AM »
Another tip: I fasten my seatclamp with 5nm and used carbon paste. Even then my seat post dropped into my frame. The seatpost was a fraction to thin. So, I used three layers of hairspray on the seatpost and now the seatpost won't drop into my frame again. And is holding now for about 6 months.

I also used hairspray for installing my handlebar grips. When the hairspray is wet, the grips are easily to install. And when the hairspray dried, the grips are fasten very well :) They won't turn around.

Cnasta

Re: IP-256SL build [disclaimer: questions inside]
« Reply #3 on: February 20, 2015, 03:44:41 AM »
Thanks for the reply! Will keep the hairspray in mind :) I used some soap to get my grips on the handlebar. Using ESI racing edge grips, small hands so Chunky's were not necessary (saved 10gr, yeah! ;) ).

The steerer/fork-tube to stem is a carbon-connection in my build (rigid xmi fork has carbon tube, stem is carbon as well).

Hope the bottlecages don't suck big-time. Otherwise I can change them with my roadbike (tacx carbon bottlecages, working perfectly). Riding with camelbag ofter as wel, but on shorter rides (<50km) I use a botle of water and a botle with tools (co2 pump, inner tire, allen-key).

Setting up tubeless with conti x-kings by the way.

Good to hear that sub 9kg should be easy. Might ad a reba fork later this year for the heavier rides in Belgium.
« Last Edit: February 20, 2015, 03:46:48 AM by Cnasta »

MTB2223

Re: IP-256SL build [disclaimer: questions inside]
« Reply #4 on: February 20, 2015, 03:55:15 AM »
I almost use the same grips, but the cheap ones out of china (32 gr/pair).


Didn't know the forktube and stem are full carbon. Do you know the weights of you handlebar, seatpost, stem etc ?

For the record, I'm using the heavy Racing Ralph Performance versions (tubeless). I could save some weight if I use the evo versions (save 100gr/each). But I like this heavy version. No flat tires so far :)

Cnasta

Re: IP-256SL build [disclaimer: questions inside]
« Reply #5 on: February 20, 2015, 04:07:59 AM »
According to Vipassanas build:

seatpost: 180gr
fork: 720gr
handlebar: 125gr
stem: 143gr

ESI racers edge: 50gr

MTNRCKT

Re: IP-256SL build [disclaimer: questions inside]
« Reply #6 on: February 20, 2015, 08:17:55 AM »
Wow! I never knew about the hairspray trick. My grips drive me crazy by moving around. Going to try hairspray tonight. Thanks!

Looking forward to following your build, Cnasta. You mentioned waiting on the frame to be painted, I'm having a hard time seeing it from the pics, but it looks like you have a two tone black paint scheme going on?

Cnasta

Re: IP-256SL build [disclaimer: questions inside]
« Reply #7 on: February 20, 2015, 09:28:24 AM »
Wow! I never knew about the hairspray trick. My grips drive me crazy by moving around. Going to try hairspray tonight. Thanks!

Looking forward to following your build, Cnasta. You mentioned waiting on the frame to be painted, I'm having a hard time seeing it from the pics, but it looks like you have a two tone black paint scheme going on?

Had to wait because BSA-frame are hot, not really because of the paintjob. It's hard to see on the crappy pictures, but I have one. It's too close, so the frame looks dirty (greasy hands) :)


Carbon_Dude

Re: IP-256SL build [disclaimer: questions inside]
« Reply #8 on: February 20, 2015, 10:02:40 AM »
Wow! I never knew about the hairspray trick. My grips drive me crazy by moving around. Going to try hairspray tonight. Thanks!

Looking forward to following your build, Cnasta. You mentioned waiting on the frame to be painted, I'm having a hard time seeing it from the pics, but it looks like you have a two tone black paint scheme going on?

I thought everyone knew the hairspray trick for grips, just something I learned when riding BMX bikes 35 years ago.  I wonder how much other knowledge is lost from generation to generation because it doesn't get passed down, probably less now that we have the internet :).
2019 Stumpjumper Expert 29/27.5+
2017 Santa Cruz Stigmata
2017 Trek Stache 9.8 (29+)
2016 Specialized Stumpjumper FSR Carbon Comp 6Fattie (27.5+) (Sold)
2016 Trek Stache 9 (29+) w/upgrades (Sold)
2014 -036 Full Suspension Chiner (Sold)
2013 -057 Hardtail Carbon Chiner (Sold)
Atlanta, GA

cmh

Re: IP-256SL build [disclaimer: questions inside]
« Reply #9 on: February 24, 2015, 05:30:53 AM »
I thought everyone knew the hairspray trick for grips, just something I learned when riding BMX bikes 35 years ago.  I wonder how much other knowledge is lost from generation to generation because it doesn't get passed down, probably less now that we have the internet :).

While I've used the hairspray trick, I find it can make getting the grips back off more difficult. What I've taken to doing, and works flawlessly with the ESI grips, is using window cleaner like Windex to install the grips. I give the top of the bar a quick spray, and it'll get down to the bottom, and then I put the end of the grip over the sprayer and give a quick shot, turn it around and do the same thing. If the grips are used, I can then get them on with no problems at all. If they're brand new, I might have to put a little more on the bar, and maybe wipe it around to make sure the whole surface is wet. Might also need to put on a glove to get a better grip for getting it on the bar. Once it's on the bar in the right place, I'll leave it overnight. Have never had an issue with grips slipping after that.

Now when it comes to taking them off, I've got a wooden chopstick and a small syringe. I put water in the syringe, get the chopstick between the grip and bar, and shoot in some water. I've used screwdrivers or sharpened spokes in the past, but you run the risk of scratching the bar, or poking through the grip, so the chopstick works great. Could be anything wooden that's not too big around. The syringe just makes getting the water into the gap between the bar and grip, and isn't necessary. I've used a water bottle or even drops of water from a wet hand. If the grips are old, that's usually enough, but if they're still new and fitting tightly, I've found that working the chopstick around the bar after getting the water in there helps. (I've used soap and water as well and that'll work better, but don't find it to be necessary, so usually don't bother.) Once the water has gotten between the grip and the bar, I can usually pull the grip right off without any problem.

This technique works so well, I've stopped running bolt-on grips. I used to use those because I make frequent changes to the bike, (can never leave well enough alone!) and there's little that's easier to remove and reinstall than bolt-on grips. However, with this water/windex technique, I've switched to ESI grips.

If you're running conventional rubber grips, this might not work *as* well. My fat bike came with standard grips well over a day after applying the grips with Windex, they were still a tiny little bit wet. My guess is because the solid rubber doesn't breathe like the silicone foam grips, but don't really know because I almost never run that type of grip anymore. This *does* work very well with the super-lightweight foam grips like MTB2223 showed, but those tend to not fit as tight so hair spray might work best with those.

Finally, back to the original topic - Cnasta, that build looks like it is going to be sweet!


Carbon_Dude

Re: IP-256SL build [disclaimer: questions inside]
« Reply #10 on: February 24, 2015, 07:36:44 AM »
Another good technique for removing grips that were put on with hairspray or some other product is to use an air compressor and an attachment with a pointed tip, which is common and come with many compressors.  All you do is lift up one inside edge of the grip, blow in the air and the grip will come right off (just remember to cover the other end of the bar so the air doesn't blow out the other side.
2019 Stumpjumper Expert 29/27.5+
2017 Santa Cruz Stigmata
2017 Trek Stache 9.8 (29+)
2016 Specialized Stumpjumper FSR Carbon Comp 6Fattie (27.5+) (Sold)
2016 Trek Stache 9 (29+) w/upgrades (Sold)
2014 -036 Full Suspension Chiner (Sold)
2013 -057 Hardtail Carbon Chiner (Sold)
Atlanta, GA

MTB2223

Re: IP-256SL build [disclaimer: questions inside]
« Reply #11 on: February 24, 2015, 07:43:44 AM »
Another good technique for removing grips that were put on with hairspray or some other product is to use an air compressor and an attachment with a pointed tip, which is common and come with many compressors.  All you do is lift up one inside edge of the grip, blow in the air and the grip will come right off (just remember to cover the other end of the bar so the air doesn't blow out the other side.
And with this trick together, try to blow some water under the grips with the air, to liquefy the hairspray and to reduce the resistance.

This weekend I removed my 2-dollar foam grips by using a knife (didn't want to save them) to put on some ergo grips. Made my bike 154 gram heavier :(

Cnasta, sorry to messing up your topic :)
« Last Edit: February 24, 2015, 07:49:24 AM by MTB2223 »

Cnasta

Re: IP-256SL build [disclaimer: questions inside]
« Reply #12 on: February 25, 2015, 01:04:20 AM »
Another good technique for removing grips that were put on with hairspray or some other product is to use an air compressor and an attachment with a pointed tip, which is common and come with many compressors.  All you do is lift up one inside edge of the grip, blow in the air and the grip will come right off (just remember to cover the other end of the bar so the air doesn't blow out the other side.
And with this trick together, try to blow some water under the grips with the air, to liquefy the hairspray and to reduce the resistance.

This weekend I removed my 2-dollar foam grips by using a knife (didn't want to save them) to put on some ergo grips. Made my bike 154 gram heavier :(

Cnasta, sorry to messing up your topic :)

Haha, no problem. My bad, should have been working on my bike and posting pictures instead of drinking beer :)

Cnasta

Re: IP-256SL build [disclaimer: questions inside]
« Reply #13 on: February 25, 2015, 03:19:37 PM »
Next question :)

Today I took the crank and BB out, as well as the fork and headset. I knew they had to be removed when installing the rearbrake and shiftercable, my next step.

Is this the correct order:

Feed inner shiftercable from top to bottom
Connect shifter on handlebar
Assemble derailleur
Put outher cable on (right lenght)
Connect cable to shifter
Connect cable to derailleur

Feed brakeline, from bottom to top
Bleed, when needed
Assemble caliper a
Assemble brakelever

If not, what order would you use?

Both cables enter on the left-side of the frame. Top hole for brakeline/hose and bottom hole for shifter, right?

MTB2223

Re: IP-256SL build [disclaimer: questions inside]
« Reply #14 on: February 25, 2015, 04:26:33 PM »
About the shiftercable:
- first make the correct length of the housing (you call it outer cable) for the part between frame and shifter (don't make it to short)
- install end cap on the housing/cable
- Connect cable to the shifter
- Put the cable in the housing
- put the cable then in your frame
- when it comes out the frame, install last part of the housing (don't forget the two end caps)
- install shifter to the handlebar (you could do it some steps earlier)
- install the derailleur
- connect cable to the derailleur.

Please consider running the shifter cable full housing through the frame. I did. I drilled out the cable stops in the frame (at the top and at the rear). I hope this won't happen to me: http://forums.mtbr.com/29er-bikes/chinese-carbon-29er-640919-post11778869.html#post11778869


About the brakeline:
... no comments ...
http://chinertown.com/index.php/topic,375.0.html

Yes, both on the left. The cables will make a nice curve.

And take a look to these instruction video's, especially this one: "How to Adjust Shimano Rear Derailleurs"